Share
Pin
Tweet
Send
Share
Send
To create a cover you will need:
• Transparent cover for student card;
• Pastel green paper;
• Green polka dot paper for scrapbooking;
• A piece of scrapbook paper with leaves in green and beige tone;
• The picture with the owl;
• Felled circle white-green;
• Printed inscription: student ID;
• Metal key in bronze color;
• Green plastic button;
• Turquoise half beads 4 mm in diameter;
• Green ink pad;
• Rep narrow ribbon of swamp color;
• Double-sided tape, ruler, scissors, glue gun, pencil, PVA glue, lighter.
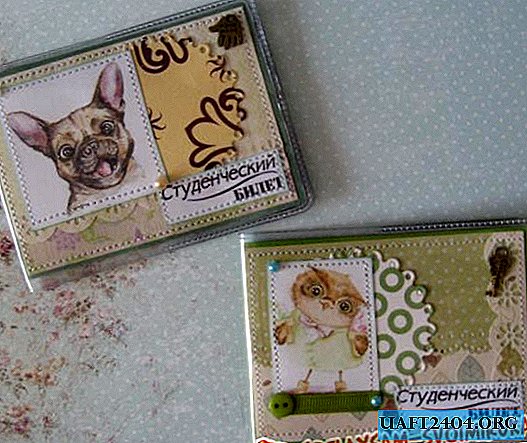

First, we need a cardboard base for a student card, which we cut from pastel paper. Cut out 7.4 * 20.6 cm one large rectangle, then divide it in half and fold.


Try on with a transparent cover.


Now we cut out two rectangles of 5 * 9.8 cm from one paper and 3.5 * 9.8 cm from another paper from scrapbook paper.


With a hole punch we make openwork one paper from the bottom and glue it with another PVA glue, we get two rectangles of 7 * 9.8 cm. On one of them we glue a picture, a circle, an inscription and a stripped strip on the left.


Sew on the sewing machine an inscription and a picture. Glue to the base both rectangles on double-sided tape.


Sew on a typewriter both parts of the cover separately. Cut the rep ribbon to the width of the picture, burn its edges, glue it under the picture, on the one hand the button. In the corners of the picture we glue the beads, and in the other corner we glue the key.


We are now inserting it into a transparent cover, the cover for the student ID card is ready. Thank you and good luck in manufacturing.


Share
Pin
Tweet
Send
Share
Send


