Share
Pin
Tweet
Send
Share
Send
Proceed and we take the following:
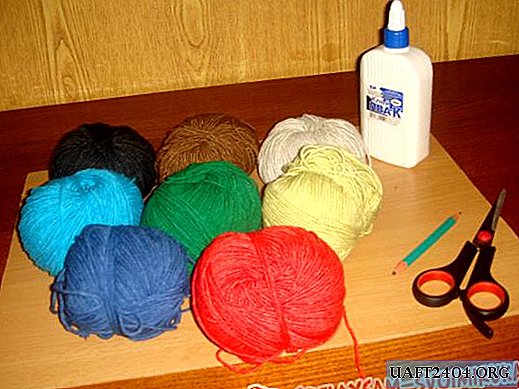
- Binding cardboard, two sheets of A4 and 7 * 30 cm 1 sheet;
- Scheme for creating a chest "Mother's treasures";
- Paper for scrapbooking in blue, 3-4 sheets 30 * 30 cm;
- Paper for watercolors, sheets of A2 format, total 5 sheets;
- Fabric 100% cotton: blue with a white bow and blue in small white peas;
- Pictures with bunnies and with inscriptions: tag, sliders, mother's treasures, metrics, etc .;
- Rep ribbon 2.5 cm wide with smurfs, about 1 meter;
- Satin ribbon blue with polka dots;
- Plain light blue satin ribbon;
- Felling in blue: flags, circle, openwork flower;
- Blue satin ribbon with baby items;
- Blue ribbon with pompons;
- Metal pendants: pacifier, tag, clothespin, bullseye, etc .;
- Wooden button with a baby;
- Blue acrylic buttons are round and in the shape of a flower;
- Half beads with a diameter of 6 mm of a color of a sea wave;
- White cotton lace;
- Puncher curb and glue gun;
- Stamp "For a photo" and blue ink;
- Lighter, scissors, glue stick, simple pencil, sewing machine, PVA glue, adhesive with the effect of double-sided tape.
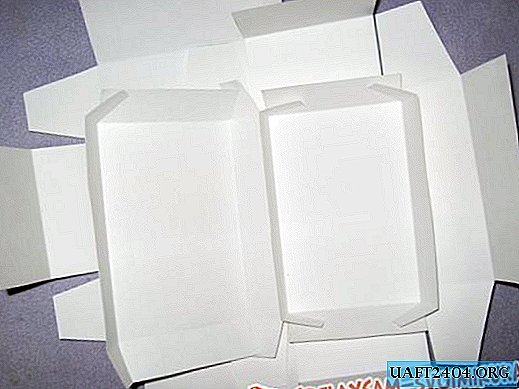
The first thing we do is lay out the diagrams of all the boxes and study. We have a scheme of the base of a small box and its cover, a scheme of a large box and its cover, a layout of boxes, a base box, a fabric cover scheme.


We start with the big base of the box, in which we will put all the boxes. We cut out its blank according to the scheme and glue it with glue-pencil. It is better not to use PVA, as it leads the paper.


From a scrapbook paper we cut out such a rectangle and glue it into the bottom of the base.


Cut two blanks of the bottom and lids for large boxes.

And six blanks for the base and lids for small boxes. First we glue all the basics of small and large boxes.


In each box we glue a scrap of a rectangle of such dimensions.


We get just such the basis of a small box.


So we do everything and try them on a large basis.


On the lid we cut 6 rectangles 6 * 7 cm and two rectangles 10.15 cm. We glue them with double-sided tape on the lids.


We sew the covers along the edge and glue them on the picture. Now glue the covers with glue stick.


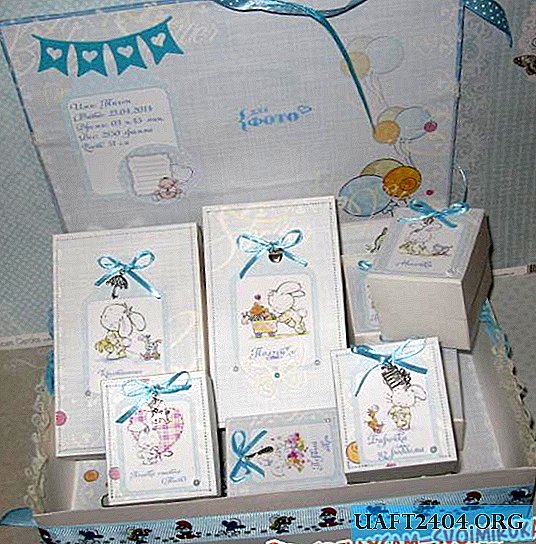
Boxes are ready.


We cut eight cuts of 7-8 cm of a light blue ribbon, burn the edges, thread a pendant in each section and tie the bows. Glue these bows with half beads on each of the boxes.


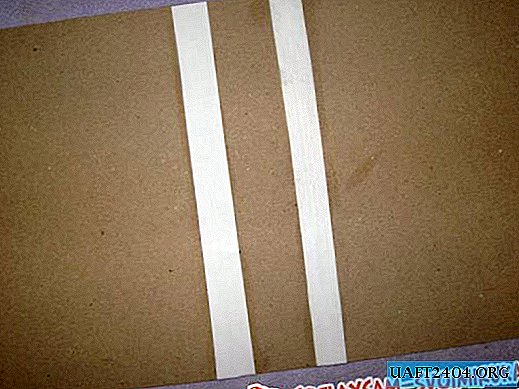
Getting to the cover. We spread binding blanks. We take the cutoffs of watercolor paper and glue them together, as in the photo.

Now we take the fabric, cut a section of 30 * 34 cm from blue cotton into polka dots and two cuts of 15 * 34 cm from a blue bow. Sew the pieces together. We sew the joints of fabrics with lace. Iron the fabrics well and apply them to the binding blank. We glue the fabric twists to the base with a glue stick, beautifully folding the corners.


Stitch the cover around the edge with a typewriter.


We spread the circles, the picture and the inscription on the cover, glue it, and then flash it. We also cut out a rectangle of 29.5 * 30 cm from scrapbook paper and glue it on it and sew on a card with a metric and a picture.


We make the ties of the chest, glue strips of ribbons on both inner sides of the cover.


Glue the adhesive with adhesive tape effect first scrapbook paper, smooth it well, then glue with the same glue the large base of the chest. It remains only to decorate the cover with buttons, bows, and beads.


Glue the flags inside and stamp the inscription “for photo”. It turned out here is such a cute box for my mother’s beauties. Thanks for your attention!


Share
Pin
Tweet
Send
Share
Send