To make a cache book we will need:
- - a box of juice;
- - scissors;
- - brown acrylic paint;
- - acrylic varnish;
- - brush;
- - white sheets of paper (approximately 2 to 3 pieces);
- - ruler;
- - self-adhesive paper (yellow);
- - cutter;
- - thick cardboard;
- - a pencil.
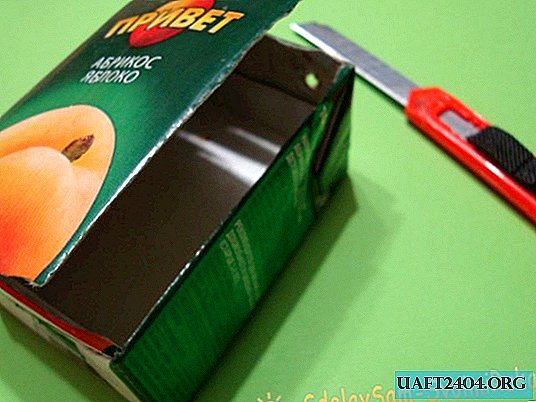
Step 1. Take a small box of juice. Using a pencil and a ruler on the box, mark the size of the window to be cut. We cut out, but not completely, a lid that can be opened and closed.
Step 2. Now take a thick cardboard, and circle the box, on both sides + leave allowances for gluing 1 cm on each side.

Step 3. Draw a rectangle 10.5 cm long and 5.5 cm wide - this will be the spine of the book.

Step 4. Cut out. Put them aside for now, we will need them a little later.

Step 5. Let's make the pages. To do this, take a white sheet of paper. We measure the box from the juice in length (the length of this box is about 8 cm + another 5 mm - these will be allowances for gluing), draw a straight line down to the end of the sheet and cut it out. There should be about 5 such strips.

Step 6. Next, measure the width of the box (it turns out about 6 cm, but also add allowances + 3 mm). We also cut strips of them, about 5 pcs are also needed. Cut out.


Step 7. We bend all the resulting strips with an accordion. The smaller the accordion, the more realistic the pages of the book will look.


Step 8. Now we will be engaged in the interior decoration of the book - cache. We glue the whole inner part with yellow self-adhesive paper. If desired, the color of the paper can be changed, for example, pink or green. If there is no self-adhesive paper, you can replace it with plain colored paper.

Step 9. We make the so-called book spine. Looking at the spine, everyone will find out what the book is called and who wrote it. To do this, take a pre-prepared rectangle that we previously cut out (10.5 cm long and 5.5 cm wide). Glue to our future book with a glue gun. The spine should be slightly curved and convex, for realism.

Step 10. Next, make the cover of the book. For this, we also take 2 rectangles, which we cut in advance. Glue them to the box.

Step 11. Paint our book with brown acrylic paint. We are waiting for it to dry.

Step 12. Now let's get down to the pages. We take the strips bent by an accordion. The juice box must be smeared with a glue gun. If there is no glue gun, Moment glue can be used. Stripes that are wider are glued in the length of the book, and narrower are glued in width. Try to stick the layers one after another as tightly as possible to each other. If the strips are not enough, you can additionally draw, bend the accordion and use. Let me remind you the sizes for the strips in the length of the book 8.5 cm and a width of 6.3 cm.


Step 13. It remains to print the name of your favorite book and its spine. In this case, I took F.M. Dostoevsky “Crime and Punishment”, for example, or L.N. Tolstoy “War and Peace” or you can even make a children's book by E. Uspensky “Three from Prostokvashino”. There are many options, fantasize!

Step 14. Using the glue Moment, glue the name of the book. Fix everything with acrylic varnish, if desired, can be coated in 2 layers. (Photo 17)
Done!


In appearance, the book cannot be distinguished from the present. Such a book - a cache will be a great gift. It can also be made from a shoe box, it will be a gigantic book - a dictionary, or it can be made very tiny from a matchbox. Imagine and you will succeed! I will be glad to your comments!


