Share
Pin
Tweet
Send
Share
Send
1) Coil: L1 5 μH
2) Resistors: R1, R3 2.2 kOhm; R2, R5 22k; R4 680 Ohm; R6 2.2 ohms; R7 10 ohms.
3) Capacitors: C1, C4- 4.7 uF-25V; C3-22 uF-25V; C3-22 uF-25V; C5-0.47 uF-25V; C6, C7-1000 uF-35V.
4) Integrated circuit: DA1 TDA2050
Also, for soldering, you must purchase: ceramic soldering iron, solder, fiberglass, ferric chloride, flux (rosin), speaker (to test the amplifier), power 10 V ("crown"), wires, connector, radiator (the chip will not heat up for the first time strongly, but still recommended to put cooling), glossy photo paper.
Now the fun part is getting ready for work. Here is a diagram of our device:

Now we need to make the wiring, which is easiest to do in the sprint layout program. After the wiring is ready, we print our wiring on photo paper (the printer must be laser!). Then we put the printed fragment on our board and for 5-10 minutes we iron the iron. Then we lower it under water and with light movements we clean the paper. Now we need to pickle the board. To do this, take ferric chloride and add it to slightly heated water and dip the board there (in no case do not use dishes designed for eating!) The etching process takes from 10 minutes to 5-8 hours, it all depends on the amount of solution and temperature water. After the board is etched, we clean off the paint layer, as a result of which our paths will become copper. Now we have to solder the elements. First, drill holes for our elements, after which it is recommended to lubricate the tracks with flux. After that, according to the scheme, we insert all the elements and solder them. On this, our work goes into the final stage, a test for operability.
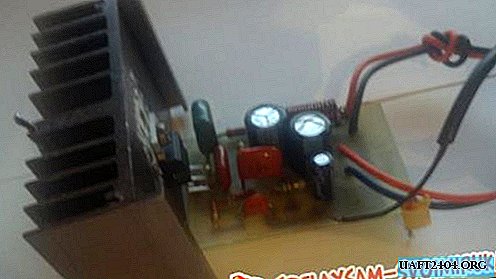

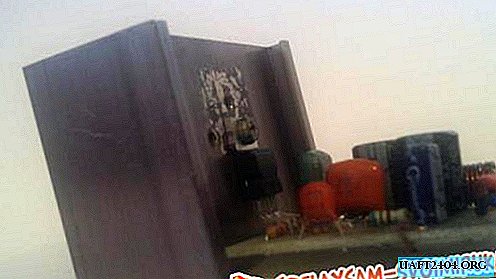
By connecting the power, speaker and connecting the jack to a device with a 3.5 mm jack, you will hear your favorite music. For convenience, you can come up with a case for your device, an example of a case you can see below.


Share
Pin
Tweet
Send
Share
Send