Share
Pin
Tweet
Send
Share
Send
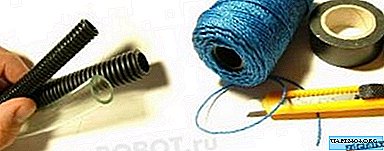
To create a robot arm, a piece of corrugated plastic tube, a box from a CD, twine, glue and electrical tape are used. The manipulator itself is strong enough to hold, for example, a bottle or a cell phone.
First, make a robot arm template on a piece of paper using your own hand. Mark the hinges for each finger.

From the plastic tube that electricians use to lay wires, make fingers. The tube is easily cut with a regular clerical knife. Cut the tube to a length equal to the distance from the end of your finger to the wrist. Do it for all the fingers of the robot. On the resulting tubes, mark the hinges with a marker and then make V-shaped cuts for each bend.

Insert and fasten a nylon cord into each finger tube. Leave the ends long enough (you can always cut them off later).

Use an old CD box to get a piece of plastic. Using the cut piece of plastic, connect the “fingers”: glue the “fingers” just below the knuckle joints.

Make sure you place your fingers in the correct order.

Now you can remove the tape fixing the twine, and make a few turns of tape to better connect the "fingers".

Glue the thumb as shown in the photo, and fix it with electrical tape for strength.

Using the remnants of your CD box, make a wrist.

The resulting robot arm is best reinforced by inserting it into a stiffer tube.

Foam can be glued to the "palm" and the ends of the "fingers".

The robot arm can be used in a wide variety of animatronics projects. To control the hand, you can use servomotors by connecting the ends of the twine with a “rocking chair” fixed on their axis. Two servos are enough for the robot arm to come to life. In this case, one servomotor is connected to the thumb, and the other to the rest. To make your hand look more impressive in animatronic projects, you can put on a soft, thin glove on it.
Source: myrorot.ru
Share
Pin
Tweet
Send
Share
Send

